| Warning: Spoilers This section or article may contain spoilers! |
The Hero of Bower Lake (Sparrow, the Old Hero King/Queen) is a descendant of the Archons of the Old Kingdom and the Heroes of the old ages. The last known hero of their lineage was the Hero of Southcliff and, before that, The Hero of Oakvale.
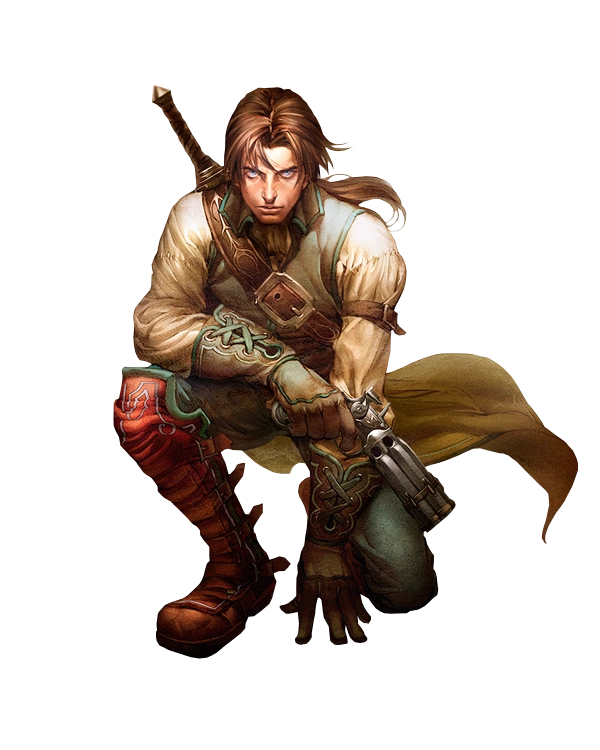
The hero is the protagonist of Fable II. The character may be male or female, by the player's choice at the beginning of the game.
Biography[]
Childhood[]
Sparrow was born sometime during the Enlightenment age of Albion. Orphaned as a child, Sparrow grew up on the slum streets of Bowerstone Old Town. Cared for by their older sister Rose, they both wanted a better life. The two lived in a shack with a fantastic view of Castle Fairfax, the home of Lord Lucien Fairfax, the Mayor of Bowerstone. Being young beggars, Rose and Sparrow always wished they could live in a castle.
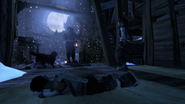
Sparrow and Rose attempted to stay warm one winter morning by huddling around a fire-lit brazier. Rose commented that the castle looked "nice in the snow" and imagined how Lucien must be having Roasted Duck this time of year. The two began hearing people cheering at the centre of town. As the two investigate, a local crook, Arfur, approaches them. The crook comments on Rose's appearance and tells her she looks hungry. He then asks her if she reconsiders his offer to become a prostitute. Rose says, "We'll never be that hungry. The answer is no!"
As Sparrow and Rose proceed to the town centre, they see a crowd of people around Mystical Murgo, a trader selling priceless relics crafted during the Old Kingdom. The trader turns his attention to a small music box and says that turning the handle three times will grant the user a single wish.
As the crowd dissipates, Rose comments on the music box and says there is no such thing as magic. A blind seer named Theresa eavesdrops on the children and tells them we live in grim times should the young no longer believe in magic. Rose says it would be a waste of money, and they could use the gold to eat for a week instead. Theresa convinces Rose that at the end of that week, she wouldn't be closer to her dream of living in a castle if she neglected her inkling of believing the magic. Sparrow and Rose believe they have nothing to lose and begin searching for ways to find five gold pieces to purchase the music box from Murgo.
Searching for Gold[]
A town guard named Derek has lost his arrest warrants. He offers to pay the children a gold piece if they find all five. Once Sparrow finds all the warrants, they may return them to Derek or accept a bribe and give them to Arfur instead.
Barnum, a local entrepreneur, is trying to get his photography business off the ground with his "life-like instant images." Barnum will give Sparrow a gold piece if Sparrow and Rose allow him to take a picture of them.
While travelling through the slum alleys, they find a bully named Rex attempting to abuse a stray dog. Rose confronts the bully, and he knocks her down. Sparrow uses one of their toy weapons and beats up Rex. After Rex runs away in fear, Rose and Sparrow try to comfort the dog. Rose mentions that it would be unwise to keep the dog because they don't have enough food.
Balthazar, a warehouse owner, is distressed because he owes protection money to Nicky the Nickname's gang. So, Balthazar asks Sparrow if they can kill the beetles the thugs put in his warehouse. As Sparrow is in the warehouse, Arfur yells through the window to leave the beetles alone and smash Balthazar's stock instead. Either way, Sparrow was paid by Balthazar or Arfur one gold piece.
A local drunk named Pete asks the children to get back his alcohol from a beggar named Magpie. Betty, Peat's friend, is trying to help Pete become sober. Sparrow was paid by either Betty or Pete, depending on who they returned the alcohol to.
Two lovers, Belinda and Monty, would meet secretly due to Belinda's mother not approving of how poor Monty is. Monty speaks to Belinda from her home balcony, but her mother, Deidre, discovers them. Sparrow and Rose act as the post and bring a secret love letter from Monty. Sparrow could've chosen to give the letter to Deidre or sneak upstairs and give the letter to Belinda. Either choice earns the final gold piece.
Rose and Sparrow finally speak with Murgo and purchase the music box—the two head off to make their wish. As the two wind up the music box, it plays a tune and begins to glow and rotate. The box then vanishes, and nothing happens. Rose angrily stomps back to their shack to find the stray dog waiting for them. The three of them go to bed disappointed.

A guard comes and wakes the children in the middle of the night. The stray dog gets startled and barks at the guard. After Rose quiets the dog, she asks the guard what he wants. The guard said Lord Lucien sent him to collect the children for an audience in his castle. Once again, full of hope and believing the wish worked, the two travel to the castle with Lucien's guards.
The guard brings the children to the highest tower in Castle Fairfax, where they meet the butler, Jeeves. Jeeves escorts the two down a long hallway, where they pass a man named Garth - a "man of few words." Rose asks the butler persistent questions about the castle and Lord Lucien. Jeeves confirms with the children that Lord Lucien has recently lost his wife and daughter and misses them terribly. Once the butler arrives at Lucien's study, he stresses to the children to show the utmost respect. And to address Lucien as "my lord" and not mention Lady Fairfax or little Amelia.
The two enter the study, and Lucien asks about the music box. He is astonished that the two were able to use it. He asks what the two wished for, and Rose confesses that they wanted to live in a castle. Lucien kindly gives hope to the two children and states that that could be arranged, for he is working on rebuilding "something wonderful." Lucien wishes to discover if the two possess "particular talents." He asks the children to step into a large stone circle at the back of his study. Rose steps through first, and a magical light begins to glow around her. Lucien tells her it's nothing to worry about. Sparrow steps in, and the magical substance now surrounds the two of them. Lucien confirms with the children that they are heroes - like from the old stories. Lucien touches the substance, and the glow of the light turns from blue to red.
Lucien eagerly runs over to his desk, reads from his schematics and notes, and says one of the children is the "fourth." Lucien pulls out his pistol and points it at Rose. As Rose begs for mercy, Lucien shoots and kills her. Lucien then points his pistol at Sparrow and shoots them. The blast from the pistol shoots Sparrow through a stained-glass window, and they fall hundreds of feet into the slums of Bowerstone. The blind seer, Theresa, and the stray dog find Sparrow still alive but with a broken body. Theresa takes Sparrow to Bower Lake and heals them within a caravan in the Gypsy Camp. Theresa promises the young hero that she will one day help them avenge their sister's death.
Youth to Adulthood[]
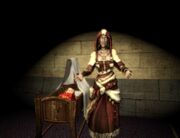
After ten years, Theresa greets the hero and their dog and tells them the day has come to seek out Lucien. Theresa leaves a chest of basic equipment and weapons near Sparrow's caravan. Once collected, Theresa finally permits Sparrow to leave the Gypsy Camp. As they leave the camp, Theresa presents Sparrow with a Guild Seal, stating it is a powerful artefact that all heroes once carried. The guild seal acts as a key to the tomb on Bower Lake and allows Theresa to communicate with Sparrow wherever they go. Theresa explains how Sparrow must first complete the challenge of awakening their blood and learning the true power of being a hero. Finally, Theresa sends them to the tomb on the island of Bower Lake. Inside are the ruins of the old Heroes' Guild.
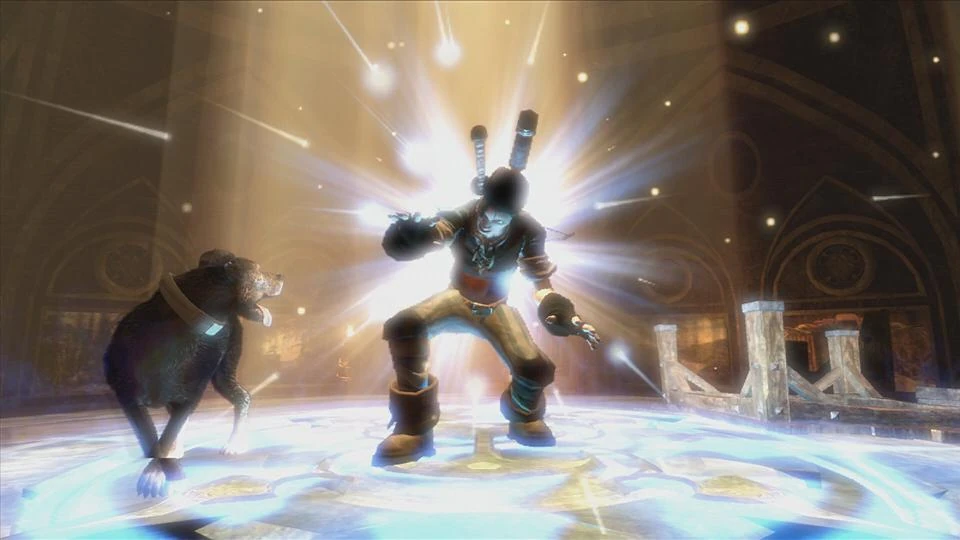
Deep within the ruins, Sparrow finds the Chamber of Fate. The chamber has frescoes circling the room that explains the story of Sparrow's ancestors. Theresa begins to communicate and guide the hero through the guild seal. She explains how Sparrow's forbear also suffered a devastating loss but grew strong to reshape the world as he saw fit. A similar circle from Lucien's study is glowing with light in the chamber's centre. Sparrow steps in, and their blood finally taps into the power of their ancestors. With this power, Sparrow can now use the ancient magic of Will. Sparrow uses Will magic on a red flit switch and activates the cullis gate at the back of the chamber. Using the gate, Sparrow teleports to Hero Hill in Bower Lake.
A bandit named Thag has been capturing gypsies and traders and selling them to Lucien as enslaved people. Officers have barricaded and guarded the roads leading out of Bower Lake. Theresa encourages Sparrow to use their new abilities against Thag and his gang. Travelling to the far side of Bower Lake, Sparrow enters the bandit camp and can see their friends from the gypsy camp are held captive in a cage. Ambushed by bandits, Sparrow fights them. Finally, Thag charges out from his cabin, kicking Sparrow's dog and charging at them. Sparrow successfully kills Thag and becomes the "Hero of Bower Lake." Upon this new victory, the barricades to Bowerstone and Brightwood are removed, allowing The Hero to explore further. The new hero finds the key to the cage in Thags cabin. One remaining bandit approaches the hero and offers to pay them for the key. The hero may choose to sell the hostage gypsies, or free them.
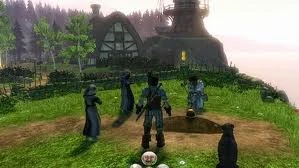
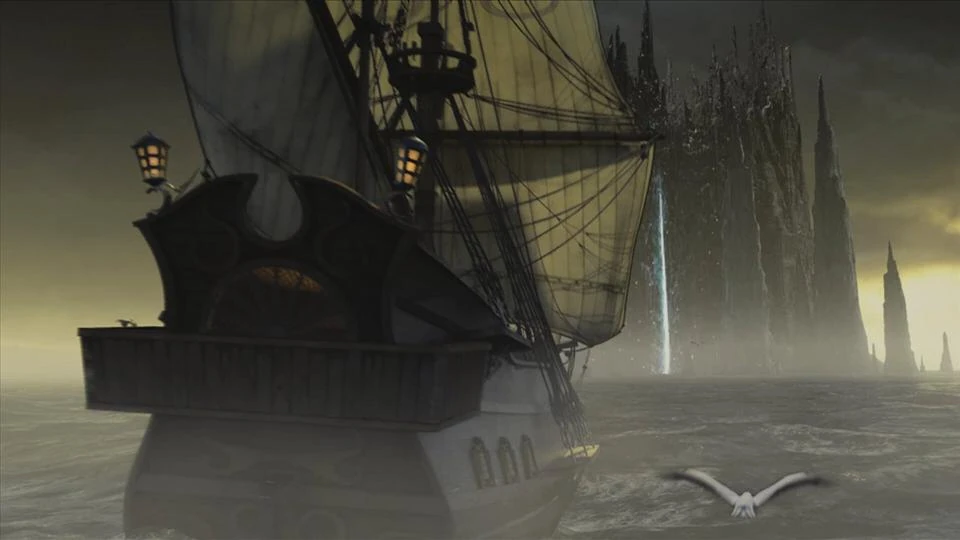
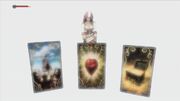
Entering Bowerstone Market, a bard named Roland approaches the new hero and becomes inspired by their deeds. He sings for the hero, "The hero went to Bower Lake and gave the Thag a belly ache." Roland continued to follow the hero and give them a tour of the Market. Theresa tells the hero through the guild seal that she will be delayed and encourages them to get a job at the blacksmith. Theresa finally arrives at Bowerstone Market and discusses the mission of avenging their sister's death. First, she asks the hero if they understand the weight of responsibility, as they have just ended many lives. Thag and his men were bandits, but they were human beings nonetheless. She also explains how the simplest choice can have "far-reaching consequences." Next, the two walk to the west side of town and look out to sea. The beginning of a fortress appears to take shape miles out. Theresa explains that the fortress is the early reconstruction of the Old Kingdom's Tattered Spire and how Lucien is in an attempt to rebuild it. Theresa describes how the original spire allowed the kingdom's ruler to bend reality to their will. Theresa stated that Lucien "found documents" that foretold a "fourth" that would stop him from using the spire, so he killed Rose. Theresa then gives the hero Fate Cards that provide steps to the hidden path of Lucien's downfall. She explained how Lucien would need the heroes of Strength, Skill, and Will to complete his plan, but the hero must find them first because they are the fourth. Finally, she directs the hero to Oakfield to recruit the Pilgrim, the Hero of Strength.
The Hero of Strength[]
Travelling to Oakfield, the hero enters Bowerstone Old Town for the first time since their childhood. The neighbourhood has changed drastically due to the hero's choice with the arrest warrants. If the hero turned in the warrants to Derek, the guard, he would greet them at the entrance. Derek explains how he was promoted to Sheriff after he used the warrants and broke up Nicky the Nickname's gang. Derek thanks the hero and tells them they're entitled to a discount on all goods and services of the old town. Alternatively, Arfur will greet the hero if they hid the warrants from the guard. Arfur explains how Lucien sacked Derek, and Old Town became lawless after Lucien disappeared. Finally, Arfur thanks the hero and directs him to his associate, Mr. Blank, if they want to work for the assassination society.
Bandits of Rookridge[]
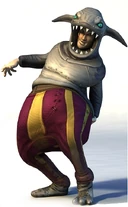
Travelling through Rookridge, the hero encounters more bandits. The bandits destroyed the bridge leading to Oakfield, making travel impossible. Theresa informs the hero the only way to proceed is by jumping into the ocean and detouring through a cave. At the entrance to the cave, a distraught father named Herman calls for his son, Joey. The hero escorts Herman through the cave infested with Hobbes. Herman begins to worry that the stories of Hobbes turning children into Hobbes are accurate and that he may be too late. Unfortunately, they find Joey as a Hobbe, and Herman collapses. Theresa urges the hero to proceed and head for the surface. As the hero enters Oakfield, they travel to the Temple of Light and find the abbot conversing with his monks. The abbot is inclined to recruit the hero to their cause if they can solve the travel and bandit issue in Rookridge. Theresa explains how the hero must gain the abbot's favour to find the Pilgrim. At the Oakfield pub, the hero may recognise Barnum, the entrepreneur from Old Town. Barnum is depressed about his latest purchase of the Rookridge Bridge, only for its destruction shortly after. The hero returned to Rookridge and killed the bandit leader, Dash. After the bandits' death, the Rookridge Inn reopens, and the bridge is rebuilt.
Theresa encourages the hero to gain more renown by completing quests or even getting married so the folks of Oakfield will do more than whisper of their deeds. The hero may choose to earn renown by visiting Susanna, the Oakfield sculptor. Eventually, the abbot hears of the hero's fame and is now inclined to recruit them. The abbot directs the hero to the Wellspring Cave, where their strongest monk awaits them. Theresa mentions how their first hero awaits them, even if they don't realise it. As the hero arrives at the cave, they hear a woman singing about the sirens of Oakvale. The woman jumps down from the ruins and introduces herself to the hero, Sister Hannah. Hannah immediately likes the hero's dog, and they bond very well. She proceeds with carrying a jug and explains her oath of pacifism. Therefore, any fighting in the cave would have to be done by the hero. Theresa comments on this and says they require a hero, not a pacifist monk, and must find a way to get her to fight.
Wellspring Cave[]
The hero and Sister Hannah enter the Wellspring Cave. They aim to collect water from two different fountains and then give a blessing. Sister Hannah begins to speak a lot about the cave and her experience as a monk. She comments on how the hero doesn't talk much. Hannah starts to talk about the monks of the North and how they believe in transcending violence and must first understand it. She imagines how life would be different if they adopted her instead of her father. She would have different beliefs. Theresa begins to weigh in and says Hannah is quite insightful for a monk, but the pledge of peace "will not do." As the hero, Hannah, and the dog walk through the steep cave, they notice a bundle of wisps at its ceiling. They arrive at the central chamber, where three gates block the path. Hannah says putting weight on the pressure plates will open the gates and require more weight for each one. The jug she is carrying will become heavier with each deposit of water. They enter the first area and locate the first fountain.
On their return, the wisps begin to possess the dead bodies of the cave, and the hero starts to battle the Hollow Men. Sister Hannah is impressed with the hero's abilities and even inspires her. Sister Hannah says she would give anything to be free of "this stupid vow." Theresa comments on this and says that sounds promising. The second fountain required more protection due to hollow men attacking Hannah while attempting to fill the jug. The final room's gate stalls, but the hero's dog runs through and detaches a head from a hollow man. Sister Hannah is further impressed by the great companion the hero has. The gate finally opens, and the two proceed—one final battle and the defeat of the headless hollow man. The two arrive in the last room, where Sister Hannah blesses the water. Just then, a monk named Robin runs in and alerts Sister Hannah about the abbot being held hostage by one of Lucien's guards. The disturbance sparks Hannah to take action. By the exit lies a stone statue holding a replica of the legendary "Hammer of Light", the weapon used to destroy the ancient Temple of Avo. Sister Hannah charges up the incline and uses her mighty strength to rip the hammer off the statue. She takes the hammer and charges for the temple. Unfortunately, Hannah was reluctant to harm the soldier due to her pledge of pacifism, resulting in the abbot's death. After her father dies, she finds her strength and kills the guard. Hannah begins to sob over her father's body and gets angry with herself for not acting sooner.

The Blessing of the Oak[]
The hero, Sister Hannah, and the other monks gathered around the Golden Oak, planted in the buried abbot's soil. Hannah says a few words but leaves the "blessing" to the other monks. Hannah stands on the hill's edge, looking out to the ocean at the Tattered Spire. As the monks leave, Hannah becomes upset about Lucien, making a new vow that he will die. She asks if life is supposed to go on as before. Theresa appears and persuades Hannah to join them in defeating Lucien. Before the two retreats to the ruins of the Heroes' Guild, Hannah asks Theresa to be called "Hammer" from now on. Once they disappear, Theresa contacts the hero and tells them to take their time before returning to the guild, as it will take some time for Hammer to overcome her grief - and even longer to explain her role in Lucien's downfall. Theresa encourages the hero to upgrade their equipment and take advantage of the sale in Bowerstone. After the abbot's death, Timothy Lightjoy arrived at the temple and accepted donations. If the hero is interested, they may donate gold to the Temple of Light.
Returning to Bowerstone[]
During the journey back to Bowerstone, the hero may discover The Temple of Shadows and how the cult recruits disciples to their dark worship. The hero may join them in their evil sacrificial deeds during this time or ignore them.
The hero can find a ghost in Rookridge crying about their past life. The hero may help the spirit if they choose to.
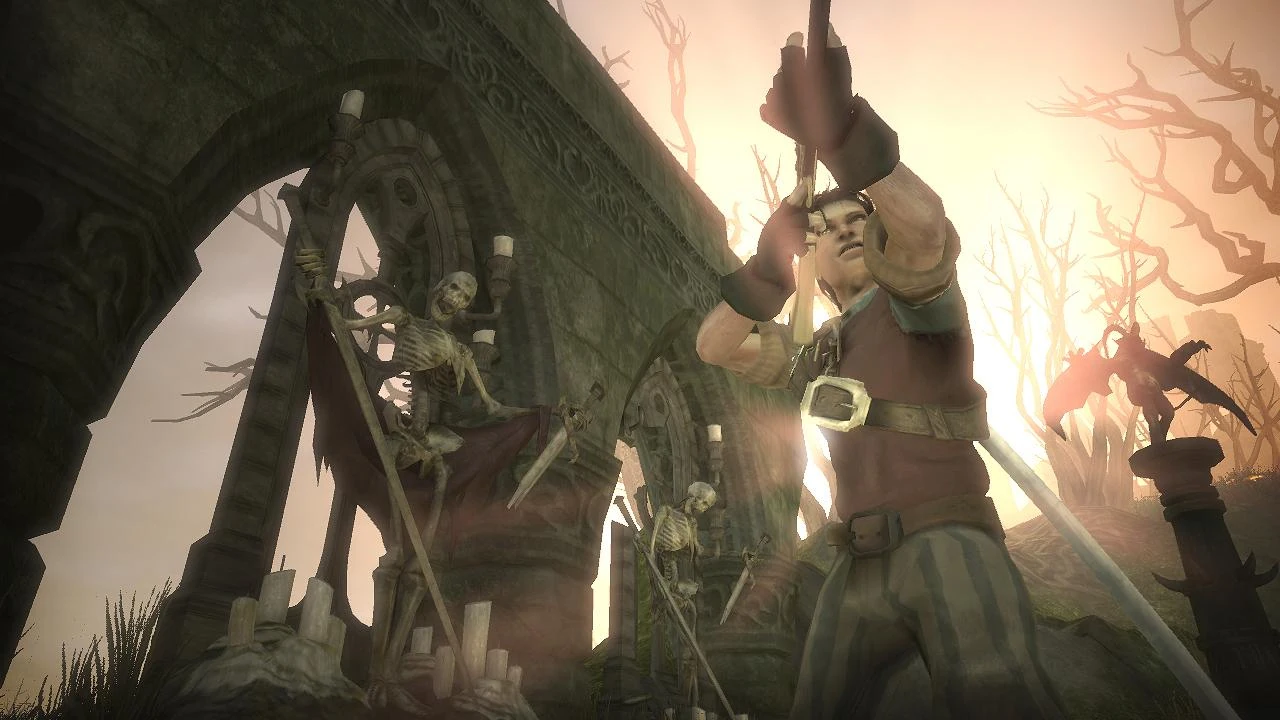
Two twin brothers, Sam and Max Spade, can be found at the entrance to Bowerstone Cemetary. The two argue about their mistake of discovering and reading from a book that summons Hollow Men. The hero may help the twins and dispatch the undead rising in the cemetery.
Belle Rennock, Albion's Archeologist, can be found on the excavation site in Fairfax Gardens. The hero may help her find clues for her research buried around Albion.
The Hero of Will[]
When the hero returns to the guild, Theresa believes the Old Kingdom scholar, Garth, is The Mage and Hero of Will. Theresa asks The Hero of Bower Lake if they remember that name, as he was at Castle Fairfax the night Lucien killed Rose. Hammer interjected and asked how they would trust Garth if he worked for Lucien. Theresa explained the difference between Lucien and Garth and how Lucien took the research they discovered literally while Garth only studied for academic purposes. She describes how Lucien and Garth had a "violent" end to their partnership. Theresa restrains Hammer for her safety but directs the hero to Brightwood Tower, where they can recruit Garth.
Entering Brightwood, Theresa warns the hero that something she has never felt is coming towards them. As the hero enters the grounds of the Brightwood Tower, a Great Shard appears in the sky and summons many spire guards that begin to siege the tower. The hero fights to the top of the tower to find Lucien's Commandant, a man with shards in his head who speaks in a disturbing voice. The Commandant captures Garth and takes him to the spire. Theresa calls the hero back to the guild.
Brightwood Farmer[]
During this time, a farmer named Giles, living in Brightwood, needs the aid of a hero. The hero may choose to aid him in avenging his wife's death and bringing the bandit Ripper to justice. The hero may alternatively assist Arfur in Bowerstone Market and join the bandits in Brightwood. The requirement will be to kill Giles if the hero chooses this path.
Lucien's Diary[]
Theresa mentions how Lucien abandoned his staff after he left for the spire - including his old butler Jeeves. Theresa directs the hero to the pub in Bowerstone to see if Jeeves can be insightful on how the hero can gain entry into the spire. The hero finds Jeeves on the upper level of the Cow and Corset. The old butler is drinking himself away with whiskey and yelling at himself about Lucien and money. The hero approaches Jeeves, who is willing to give them a map to Lucien's diary location for one thousand gold pieces. The hero pays Jeeves in exchange for the map. The hero can kill Jeeves at this point to get their money back.
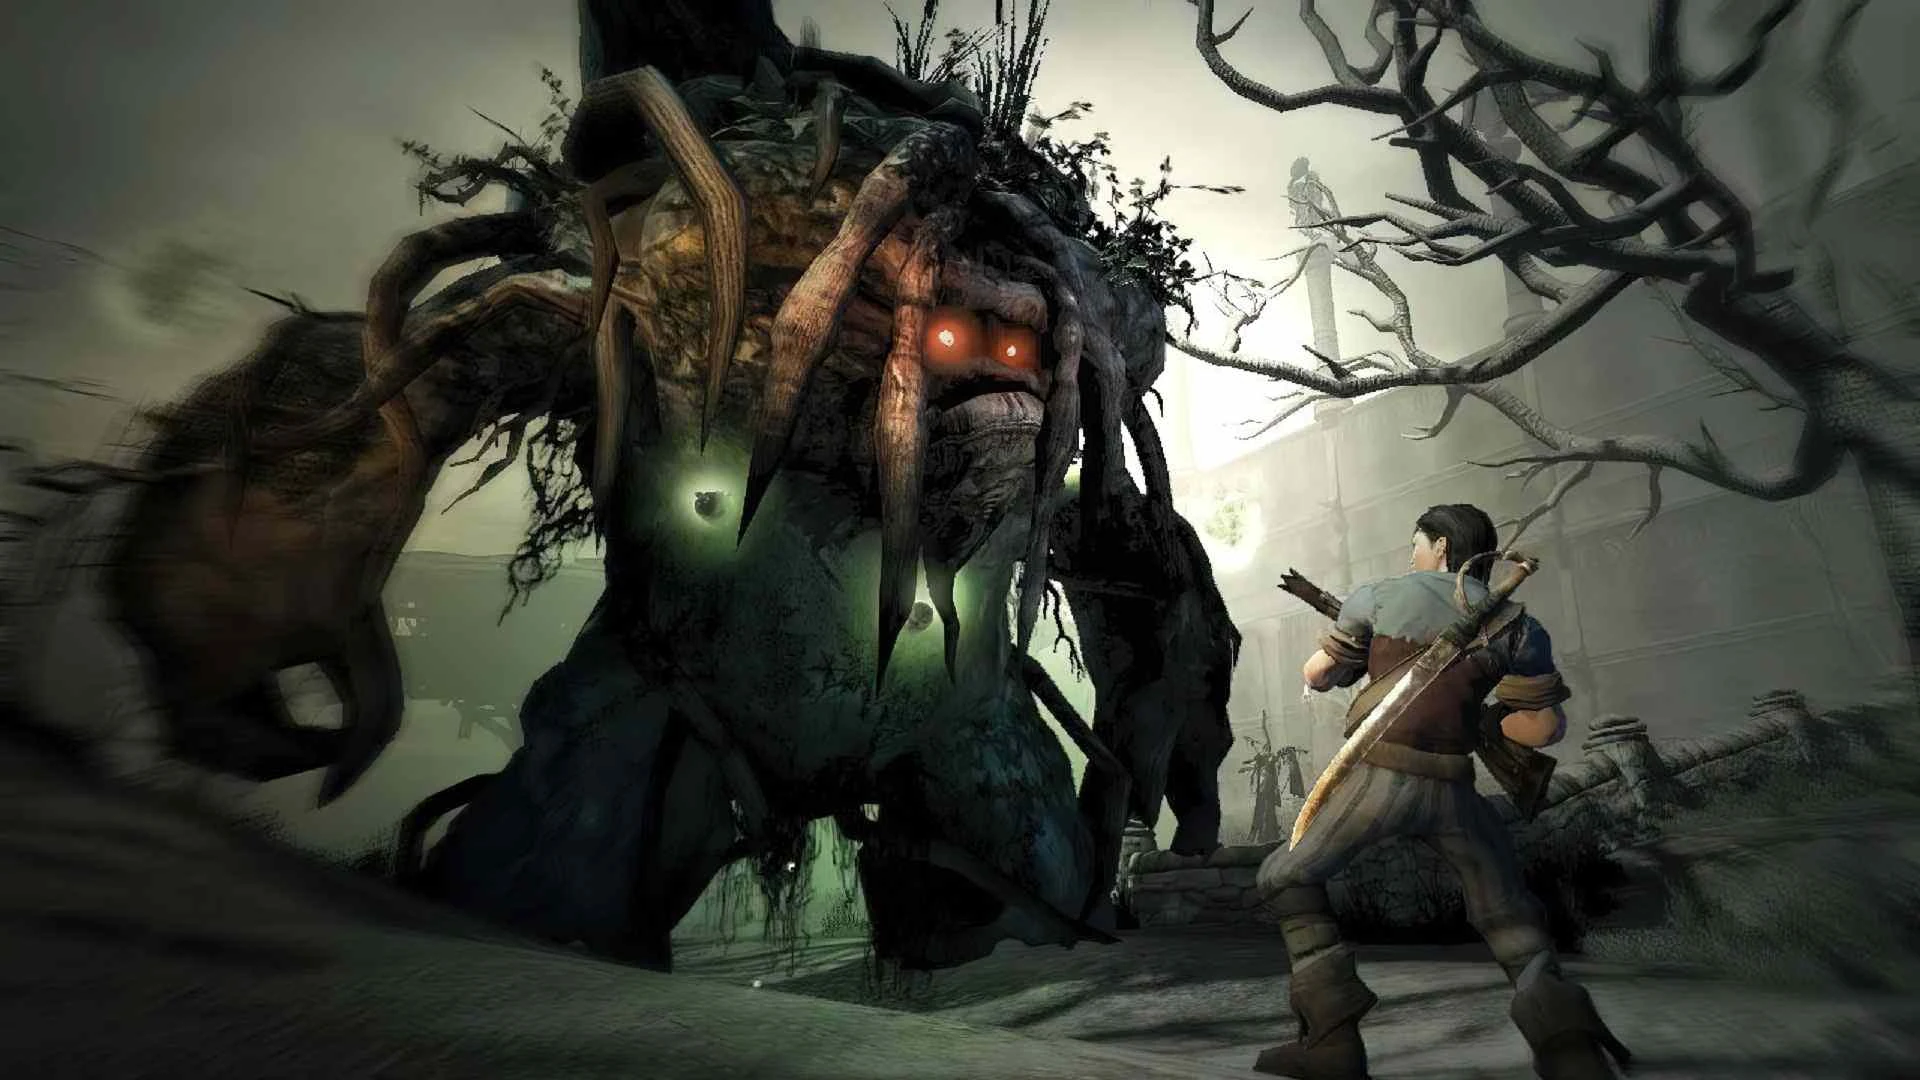
Following the map, the hero finds themselves in Bower Lake, just in the shadow of Hero Hill. The hero, however, makes their first encounter with a Forest Troll just on the dig sight. After defeating the troll, the hero's dog digs for the diary. After the hero digs up the diary, they discover its contents written in the Old Kingdom text. Theresa instructs the hero to return it to the guild so she may translate it.
Back at the guild, Hammer questions how Theresa can even read the diary being blind. Theresa claims she can see other worlds than this one. Eventually, Theresa discovers that Lucien is recruiting Crucible champions as guards for the spire, as they are physically tough but mentally weak. Theresa instructs the hero to Westcliff to win The Crucible, for it is the only way to rescue Garth. Hammer is thrilled that Theresa finally allows her to leave the guild.
The Road to Westcliff[]
The hero and Hammer begin travelling the Bandit Coast. Hammer is pleased that she finally gets a taste of being a hero. The two fight their way through to the "infamous barricade", which Hammer effortlessly destroys. Eventually, they end up in Westcliff, where Hammer relays a story about the horrific Balverines and how they infest the region. As they continue, the hero and Hammer are given their first challenge against a true Balverine.
Further ahead, a woman named Lilith screams for help. Lilith stands before her dead husband and says the Balverines took her son. Hammer and the hero continue to fight the Balverines while also protecting Lilith. The group arrives at the Howling Halls, an underground cave that travellers must enter to reach the Westcliff Camp.
Lilith worries about her son's safety inside the halls. Hammer complains that the Halls are a required part of the Westcliff route and that cutting down a few trees would be safer. As they come to the heart of the halls, the door locks behind them, and Lilith reveals herself as the mother of the Balverines and has lured Hammer and the hero into a trap. The hero and Hammer are now viciously attacked by many Balverines. Further ahead is a pit of spikes and no way of crossing. After slaying almost a dozen Balverines, the two have a moment to think. Finally, the hero spots a weak pillar in the hall that could make a bridge across the pit. While Hammer channels her strength to break the post, Lilith returns in her proper form as a White Balverine. The hero defeats "Lilith" while Hammer breaks the pillar. The two can now safely cross the pit and leave the halls.
Finally, in the Westcliff camp, the hero and Hammer proceed through the thugs, Biff and Ron, mocking them and approaching the gatekeepers of the Crucible. Allen Murray and Mad-dog 'The Strangler' McGraw may give the hero a hard time if they need to be more famous. The hero must further their reputation by continuing to help the people of Albion (side quests.) If the hero has obtained enough renown, the gatekeepers will allow them the chance to compete in The Crucible.
The hero enters The Crucible and may interact with other contenders - Zachary, the silver-tongued mage; Gorgoron, the soul slicer; Meatbane, the bandit; and Crossbow Bessie. After they all make excuses for not going next, the hero is selected to enter the first round. The gatekeepers, Murray and Maddog, are commentators and will voice their opinions on the hero as they climb through the rounds of The Crucible.
The hero emerges victorious within the arena, and the gatekeepers congratulate the hero. At the base of The Crucible, the thugs and Hammer cheer and celebrate the hero's victory. Hammer urges the hero to take time before leaving for the spire. She says she will wait for the hero by the Westcliff docks to see them off. During this time, the hero may participate in the Westcliff Shooting Range. In Bowerstone, a high guard needs to recruit a hero to rescue citizens captured by slavers. Alternatively, the hero may travel to Bowerstone Cemetary and allow Mickey the Spider to compel them to capture civilians into slavery.
The hero may complete any remaining inquiries the people of Albion may have or visit their families if they have one. Once completed, the hero departs for the spire and leaves their dog and possessions in Hammer's care.
Difficult Choices in the Spire[]
Arriving at the spire docks, the crucible victors step forward and begin walking to the heart of the spire. The spire hums with vibrational energy, and the other recruits comment on how "wrong" and strange this place feels. Next, the hero meets with a fellow recruit named Bob, who believes, based on the appearance of the spire, will give him and his wife a generous income and retirement. Bob continues speaking highly of his wife, Lil, and his loyalty to her. At the end of the path, the hero and recruits find Lucien on an elevated platform. Now an older man, more obsessed with his "vision", Lucien begins to give a speech to the crowd. First, he tells the group that the world outside these marvellous walls is a corrupt, rotting husk, full of chaos. Lucien continues and says chaos shortens innocent lives, and fools only accept this as fate. He ends his speech by saying he only requires obedience and not to fear the throbbing energy of the spire, as it will soon be as familiar as your heartbeat. Lucien then casts a "sleep" spell over the group.
Week One[]
The hero, or "Recruit 273," awakens within the walls of the spire, now in full guard uniform and a shock collar around their neck. The superior officer that awakens the hero tells them that the collar is part of the obedience program. The officer warns the hero of the consequences of being disobedient and orders them to report to the Commandant.
On their way to the Commandant, the hero meets up with Bob, and he continues to talk about his lovely wife, Lil. Then, they walk together past all the spire's slaves caged behind magical barriers. They find Garth stripped down to nothing but boots and pants at the final cage. Garth begins to speak to the hero telepathically. Garth says he knows they're a hero and urges them to be patient, as their powers would be useless with the shock collar on.
Entering the Commondant's chamber, the disturbing man from Brightwood Tower turns to the hero and introduces himself as the Commondant. He tells the hero they are nothing more than the "next link in the chain." The Commandant now begins to test the hero's loyalty and obedience. The hero may follow the orders to stand still, thank the Commandant for striking them, and beg for his mercy. However, failure to obey will cause the device around the hero's neck to activate and cause them to lose experience points. Three failures result in the hero passing out for an unknown time.
Week 38[]
Bob and the hero stand on the surrounding edges of the spire walls looking out at the construction progress. Now with very different behaviour, Bob begins to tell the hero how he had to torture a recruit for saying they missed their family. Bob adds, "he is glad he doesn't have a family", truthfully or choosing not to have any recollection of his wonderful wife, Lil. Bob also mentions that he hardly notices the sounds anymore as they are "familiar as his own heartbeat." A commanding officer orders Bob to the barracks and the hero to the detention centre.
On their way to the detention centre, the hero walks past Garth's cage, and he once again urges the hero to be patient, and that time has little meaning in the spire. Once at the detention centre, the hero covers for another officer as he takes a lunch break. The hero is ordered not to feed the prisoners. Instead, the hero may stand there and watch them beg. Should the hero pull the levers and feed the prisoners, the shock collar will activate only three times before the hero falls defeated.
Week 137[]
After being summoned to the Commandant, the hero sees two officers around Garth's cage. Again, Garth telepathically tells the hero to be strong and not let them break the hero's will. The Commandant greets the hero and walks over to an officer lying face down on the floor. The officer is Bob, and he is perplexed and mumbling to himself. The Commandant hands the hero a master cutlass sword and orders them to kill Bob. Bob begins to beg for mercy and says he will work harder. The hero may choose to end Bob's life or instead attack the Commandant. If the hero follows the command, The Commandant will tell them they will make an excellent soldier. Refusing will activate the shock collar, and the Commandant will tell the hero that he will find their breaking point, as everyone has one!
Many Years Later[]
With Garth placed deeper within the spire, the hero could not locate him for many years. More soldiers, like the Commandant, appeared, and Lucien remained behind the great white light in the spire's main chamber. The Commandant informs the hero that construction of the upper tier will begin tomorrow, and the man overseeing the sight has gone missing. The Commandant orders the hero to find him. Arriving at the guard's dead body, Garth electrifies and destroys the hero's shock collar. He admits that it took him years to focus enough Will to destroy their collars and kill the guard, but he will now be useless against any trouble. The hero takes the weapons and potions from the dead guard, and the two head to the Cullis Gate in the Commandant's chamber.
With the hero no longer bound to the shock collar, they can now use their powers of Will again. The alarms sounded, and the spire guards were put on alert. The hero kills all the soldiers that attack them and Garth. Finally reaching the Commandant's chamber, the two look out to see more recruits have arrived at the docks. The Commandant arrives and locks Garth in a shock hold. The Commandant may be surprised, or not, by the hero's betrayal, depending on how they behaved during their time in the spire. The hero now faces the Commandant and his guards to the death. The hero perishes the Commandant, and Garth is set free. Garth was able to use the experience orbs to replenish his power. Garth activates the Cullis Gate, and the two teleport to the docks. The hero and Garth kill the remaining spire guards, and they sail out of the spire with the recruits.
Arriving at the Oakfield docks, Garth thanks the hero and says he thought he would never see land again. Garth turns around and asks the hero if that is another friend of his, and as the hero looks up, they see Theresa with their dog. After being gone for ten years, the hero gets on one knee and pets their happy and faithful companion. Theresa then welcomes the hero home and says they have done the impossible. Theresa then includes Garth and persuades him to join their mission. Finally, Theresa returns the hero their belongings and tells them that Hammer is at the Inn in Rookridge. While Garth and Theresa teleport to the guild, the hero may choose to catch up with Hammer.
Albion has changed in ten years. The Temple of Light may have prospered or perished. The Golden Oak planted in The Abbot's grave may have been destroyed or become a full-grown tree. Westcliff may have evolved from a camp of thugs to a charming village of common folk - with a better route to travel than the Howling Halls. But, of course, all these changes depended on the hero's actions before they left for the spire (side quests.) If the hero visits The Temple of Light, a strange man named Tommy needs the hero to help him rid the Hobbes from his home. If the hero helped Farmer Giles, they may return to his incredibly reformed farm in Brightwood. Giles tells the hero that he is ready to retire from farming and plans to pass the farm off to his son Rupert. Giles asks the hero if they can help his son find a date.
The Hero of Skill[]
Hammer is overjoyed to see the hero once again. She states that she never gave up hope, as it was hard to anyway because Theresa said she foresaw their safe return. Before departing the inn, Hammer mentions she is meeting someone who has information on their third hero, The Hero of Skill.
Returning to the guild, Garth mentions how he had no idea about the hero's sister at Castle Fairfax. Garth adds that if he had known Lucien would kill Rose, he would have tried to stop him. Hammer arrives after gathering information on the Hero of Skill. Unfortunately, Garth and Hammer tend to get off on the wrong foot, as Hammer still has a mild distrust for Garth. Hammer calls Garth Lucien's lackey, and the two bicker a bit. Theresa finally interjects and asks about the Theif. Hammer believes the Theif and Hero of Skill is likely a Pirate named Reaver. She says that he runs the port town called Bloodstone. Garth begins to critique Hammers's research because her source is "some drunk." Hammer claims the source sailed with Reaver for years, said Reaver would take down galleons with one bullet, and captured hundreds of ships. Theresa states that Bloodstone is surrounded by a dangerous swamp called Wraithmarsh and the ocean, making travel difficult. Garth suggests using a cullis gate at his tower, but Theresa warns them that the spire soldiers control the tower. Hammer, Garth, and the hero head to Brightwood Tower to activate the Cullis Gate.
The Cullis Gate[]
The trio uses the back entrance to Brightwood Tower, where they confront many spire guards, soldiers, and shards. Finally, after many battles, the three reach the tower's roof, where Garth begins to activate the Cullis Gate. The Great Shard appears and summons more guards. Hammer and the hero protect Garth while he charges the gate. Once complete, the hero and their dog go through the gate first. While the hero succeeds in reaching Wraithmarsh, the Cullis Gate, unfortunately, malfunctions, preventing Hammer and Garth from reaching the hero. The blast from the Cullis Gate stunned the hero. While stunned, a hermit named Old Gregg captures the hero and locks them in a cage.
Stranded[]
When the hero awakens in the cage, Old Gregg taunts the hero and tells them the banshees most likely killed their dog. Old Gregg runs forwards to see the cause as the fog becomes thicker and more inclusive. The hero hears Old Gregg beg for his life, then a loud screech and Old Gregg is tortured and killed almost instantly. Finally, the fog dissipates, and the hero's dog grabs the key off Gregg's body and frees their master. Theresa finally makes contact with the hero, warning them that the fog from Wraithmarsh dampened the Guild Seal, making it difficult for Theresa to communicate with them. She tells the hero they must travel alone through the marsh and reach Bloodstone.
Further ahead, the hero finds the source of the fog to be a Banshee. The creature looks into the hero's soul and taunts them using their worst nightmares. The hero slays the banshee and her minions and proceeds through the marsh. Theresa continues to comfort the hero as they travel through this dangerous region. Theresa mentions that Wraithmarsh was once a village called Oakvale, which has seen many cruel deeds - including an awful bandit attack six centuries ago. She adds that the final destruction happened when a young villager struck a deal with the shadows and traded the safety of his family and Oakvale as payment. The hero proceeds and faces many hostile creatures, including Balverines, Elder Hollow Men, another Banshee, and a Swamp Troll. The hero finally reaches the entrance to Bloodstone on the far side of the marsh.
King of Thieves[]
The hero arrives in Bloodstone, home to lawless pirates and bruisers. At the top of Bloodstone lies a large mansion where Reaver lives. If the hero is not famous enough, Reaver will not waste time speaking with them. During this time, the hero may continue to assist those in need. Theresa tells the hero that a sea captain can give them passage if they need to leave Bloodstone.
The hero may "help" Toby Trotter in "reforming Bloodstone."
An old pirate named Salty Jack is at the pub on the Waterfront. The locals are calling him mad due to his claim of seeing the deceased Captain Dread. The hero may help Jack prove it.
Garth has decided to sell Brightwood Tower. The hero may purchase it should they take a ship and return to the mainland.
Granny Miggins needs a hero's help finding her grandson after he ran off after a picnic in Bower Lake.
The Spade twins somehow ended up in Wriathmarsh, and their mother needs the hero to find them.
Victor, the grave keeper of Bowerstone Cemetery, needs assistance with his "science experiment".
The hero may help the owner of the Lucky Heather (Rookridge Inn) dispose of Something Rotten.
If the hero is favoured sufficiently, Reaver will greet the hero and agree to join them if they return to Wraithmarsh and deliver his Dark Seal to the Shadow Court. However, Theresa warns the hero that Reaver is not being entirely truthful, and the Shadow Court were the beings who destroyed Oakvale.
The Shadow Court[]
After defeating another Banshee, the hero arrives at a deep well in the centre of Wraithmarsh made of tombs. The hero uses the dark seal to unlock the entrance, and they proceed into this dark sanctum. Upon entering, the hero can hear an echo of a woman sobbing. Next, dark shadow creatures appear and begin to attack the hero. Finally, as the hero approaches the centre of the well, the sobbing grows closer. The hero finds the source of the sobbing to be a woman named Elizabeth. She looks at the hero and begs for them to help her. Elizabeth states that she was reading a book with friends and ended up there. Three figures appear across the well and welcome the hero and Elizabeth. The Shadow Judges say only one is required to sacrifice their youth so Reaver may obtain his. The Judges will take whoever bears the dark seal and give the two of them a moment to choose. The hero may decide to keep the seal and sacrifice their youth to the court, or they may force Elizabeth to hold it so the judges may steal her youth instead. Whoever the Judges take, they become old, and their eyes change a glowing red as a mark of the shadows. The Judges stated that if the sacrifices stop, they will come for Reaver for dishonouring the bargain - confirming Reaver to be the one who sold Oakvale to the shadows.
Bloodstone Assault[]
Returning to Reaver's mansion, Barnum stands before Reaver taking a photograph of him. Barnum admits that it will take three months before the developed picture. Reaver disagrees with three months; thus, he uses his Dragonstomper .48 and shoots and kills Barnum. Reaver then turns to the hero and judges their appearance based on their decision at the Shadow Court. Reaver then pridefully admits that he betrayed the hero and has summoned Lucien to Bloodstone. Reaver plans to sell the hero to Lucien in exchange for riches. However, the town suddenly is attacked, and Lucien hunts the hero and Reaver. Reaver's henchman warns him that Lucien is after him too. Thus, he and the hero escape through Reaver's secret passage.
Reaver and the hero manoeuvre through the passage to discover spire guards have already breached and invaded the tunnels. As the two fight through, Reaver brags about his weapon, the Dragonstomper .48, and how rare it is. He goes on to say that only six pistols were made, and he has killed four owners. Finally, the two expel the spire enemies and arrive on Smugglers Beach.
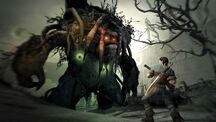
The two find Hammer and Garth already on the beach. As Reaver attempts to leave on his escape ship, The Great Shard appears and destroys it. Then, the Shard begins summoning dozens of men to the beach. The four of them face Lucien's army together. Garth begins using different forms of magic on the Shard and discovers Shock is the best against it, for it is a long-sustaining attack. Once the vulnerable area opens, the heroes strike down the Shard, and it explodes into the ocean.
As the four heroes claim victory, Reaver proceeds to escape. Theresa appears on the beach and convinces Reaver to join them, saying he will lose his bargain with The Shadow Court if Lucien prevails with his plan. Reaver finally breaks his reluctance, and he joins the other heroes.
The Great Weapon[]
Theresa teleports everyone to the top of Hero Hill in Bower Lake. The four will summon the great weapon they need to defeat Lucien. Before they begin the ritual, the heroes briefly discuss Lucien and his goal. Garth states that it all started with him wanting to resurrect his family, and probably still does, but he realised there could be more he could gain by using the power of the spire - such as controlling the world.
Theresa then instructs the heroes to stand on their corresponding pedestals, with The Hero of Bower Lake on the central pedestal. She states that The Hero of Bower Lake represents that which binds the three together and that all four shall summon the weapon. Once the ceremony completes, they all lay stunned by the energy it took from them to do so. Hammer notices that Theresa is missing. Four shards appear and summon many spire soldiers and Lucien himself. Lucien tells the heroes that they are wasting their powers on the old world when they could instead use them to build a new one. Lucien's men take the heroes of Strength, Skill, and Will to the spire while the Hero of Bower Lake remains in the centre of the hill. Lucien approaches the hero and says he should have gone into the dark and found their body the night he shot them. Lucien confesses that he was too hasty. If the hero had a spouse or any children, Lucien admits to having them killed, so the bloodline will never flourish again. Lucien pulls out his pistol again and points it at the hero like he did twenty years before. As Lucien pulls the trigger, the hero's dog jumps before the blast to save their master, and the poor creature dies. Lucien again points his gun at the hero and shoots them.
The Perfect World[]
Sparrow awakens to find their sister Rose waking them up out of bed. Rose tells Sparrow that she has planned a fun day, as she has placed bottles around the farm for them to shoot. As the two siblings walk through their large home, Rose says they could also round up some chickens and kill some beetles. After that, Sparrow may choose how to spend their day with their sister.
At nightfall, Rose and Sparrow head to bed after a beautiful day. In the middle of the night, Sparrow awakens to hear a familiar tune from the woods. Rose tries to convince Sparrow to go back to bed and ignore it. But instead, Sparrow follows the path outside and proceeds to pursue the music. As Sparrow gets closer to the woods, Rose begs her sibling not to leave her alone. Once Sparrow passes through the gate into the woods, Rose screams and disappears. As Sparrow continues to pursue the music, the region is set on fire while dead bodies are found along the path. Finally, Sparrow reaches the trail's end and finds the music box. Once Sparrow grabs the music box, they review their memories of their life as a hero. As the final memory concludes, Rose tells Sparrow that they passed the test, and they may now use the music box to destroy Lucien.
The Wish[]

Back to reality, the hero finds themselves on the spire's docks. They travel down the path to the heart of the spire, where the main chamber is now accessible. As the hero enters the room, they find a ritual similar to the one on Hero Hill, except with Lucien on the central pedestal rather than the hero. With Hammer, Garth, and Reaver trapped beside Lucien, the hero approaches them. Lucien commends the hero as they have now cheated death twice. Lucien attempts to cast his "sleep" spell but does not affect the hero. The hero holds up the music box and slowly dismantles Lucien's power over the three heroes.
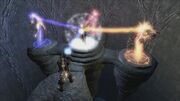
Stripped of his power, Lucien stands before the hero and attempts to convince them that his plan has a purpose. The hero may now choose to shoot Lucien or stand and listen to his ramblings until Reaver shoots him. Either way, once Lucien is shot, he loses his balance and falls to the pit of the spire. Theresa appears in Lucien's place on the central pedestal and congratulates the hero on their victory. Theresa states that the spire has awakened and can now grant one wish. Theresa offered the hero three choices, allowing them to claim their desired wish.
The Sacrifice choice would only give the hero the gratitude of Albion, as it would resurrect all those who died in the spire's construction. The Love choice would restore the hero's family, sister, and dog. Finally, the Wealth choice would grant the hero wealth beyond the measure of man, awarding them one million gold pieces. Hammer, Garth, and Reaver will respond accordingly, depending on the hero's preference. Now that the journey has ended, Theresa asks the heroes where they want to go, as she can send them anywhere from the spire. Garth asks Theresa to send him home to Samarkand, while Reaver asks to go with him as he has never been there. While Garth tells Reaver to stay out of his way, he invites Hammer to go too. Hammer declines and asks Theresa to send her North so she can study with the warrior monks. Reaver says goodbye to the hero but states he must return eventually due to his obligations in Wraithmarsh. Garth states he had doubts about the hero initially but was glad to meet them and says they shall meet again. With Hammer knowing the hero the longest, she comments on their personality and morality. If the hero is saintly, Hammer would call the hero the greatest friend she ever had before she says goodbye. With the mission complete, Theresa now looks at her pupil and tells them the world is theirs to enjoy. Theresa claims the completed spire for herself and sends the hero to the Oakfield docks.
Knothole Island[]

Though the hero undertook many other quests for renown, gold, and other rewards, one of the more notable ones was depicted in the first downloadable content, Knothole Island; it begins with the hero spotting a man, Gordon, down by the Bowerstone Market docks, who seems to be waiting for someone. He reveals that he is looking for a Hero because his home, Knothole Island, is in trouble.
Gordon takes the hero to the island in his submarine, and the hero finds that the place is freezing to death. The Chieftain, the island's leader, informs the hero that their warriors died long ago. They were the only ones that had access to the weather shrines, which could control the weather, and only a Hero like them could get inside a shrine now to change the weather to warmer conditions. The hero accepts and, with the ice seal, gains access to the ice shrine.
Upon defeating several shadows, the hero uses the totem to change the weather to scorching conditions, which melt all the ice. Now, the hero may take advantage of some of the previously closed stores during the weather, including the Box of Secrets, where "every purchase is a mystery and a surprise", in which the player may trade in certain items for strange new weapons and clothing. Soon, however, the people of Knothole Island became unhappy again as their island was now a wasteland instead of a glacier. The Chieftain demands the hero's help to access the sun shrine. The hero does not disappoint and activates the storm totem to make it rain all day instead of snowing or flaming. Yet again, the Chieftain complains and demands that the hero return things to how they were, snowing and freezing.
Upon finding the storm seal, the Hero gains access to the storm shrine and after defeating several shadows and solving several puzzles (again), the island is returned to the glacier that it used to be. The Chieftain thanks the Hero and then asks the people of the island to pay a tax for the maintenance of the weather shrine. They refuse, as the Chieftain got them into this problem in the first place. The Hero may have sided with the Chieftain to get ten thousand gold, or with Jessica (the manager of the Box of Secrets) to earn the respect and love of the people of the island, which would result in the exile of the Chieftain. The Hero, regardless, gains access to the Weather Chamber and the power to change the island's weather whenever it suited.
Also, if the Hero goes to the island after completing the main quest and they chose Wealth or Sacrifice, they may trade the soul of a person in a strange shrine for the soul of their deceased dog. However, no morality or purity is lost for doing this.
Seeing the Future[]

In the second downloadable content, See the Future, the hero is given one last quest in which Murgo, who sold the hero the music box many years ago, has returned to Bowerstone with more "interesting" items. One such item is a cursed snowglobe which appears to be the resting place for the souls of those who inhabited Oakvale before Reaver destroyed it. Unfortunately, all the colour has been drained from their world, and the inhabitants ask the hero to help them. It turns out Shadow Worshippers were responsible for this, and after they are killed, all the colour returns to the world, allowing the ghosts of Oakvale to rest in peace.
The second item the hero gets from Murgo, a cursed skull, takes them to a region known as Celestial Keep. A knight is trapped in a large skull because of what he says was a necromancer who cursed him to be stuck there forever. The knight asks them to retrieve wisps, which help unlock the chains holding him. The hero must wear ridiculous outfits such as Hobbe, Balverine, and Hollow Man costumes to do this. Upon delivering the wisps, it is revealed that the so-called knight is the necromancer himself. The hero defeats him and leaves.
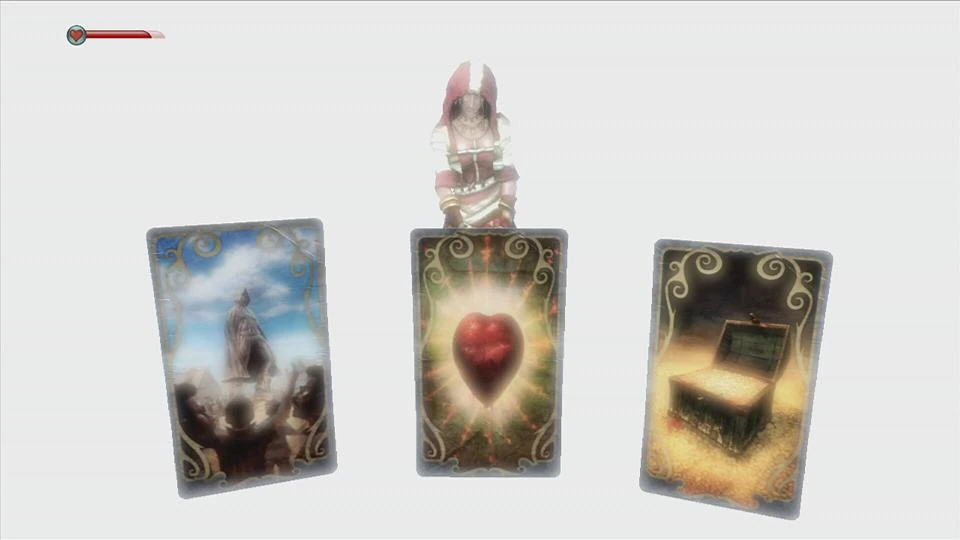
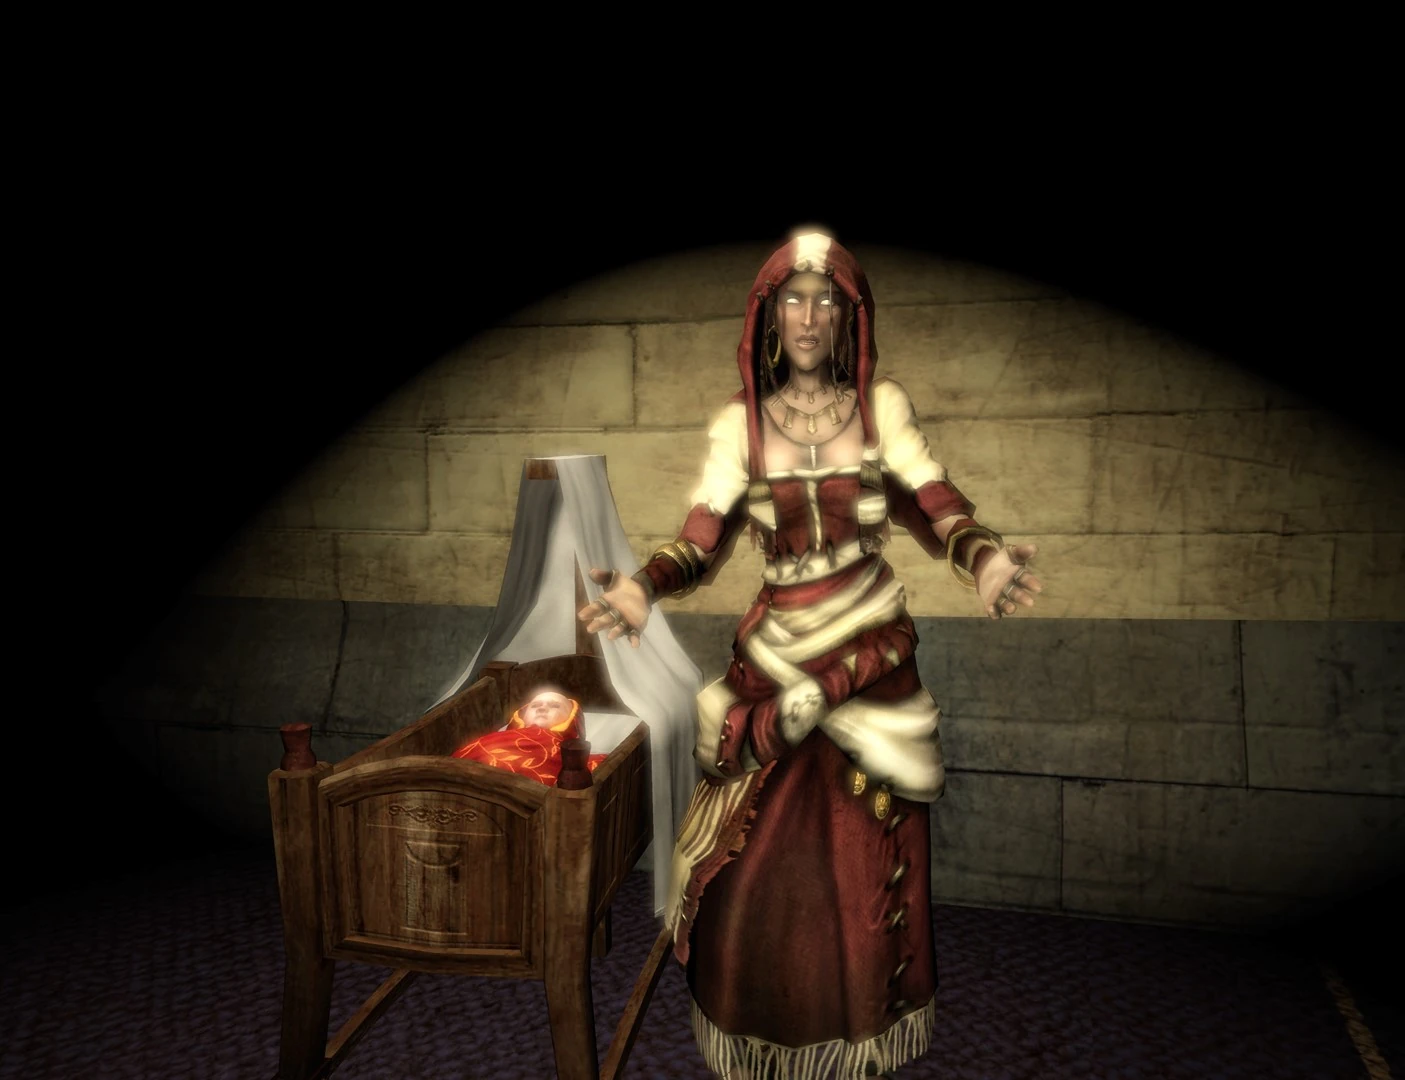
Theresa revealing the future to the Hero of Bower Lake.
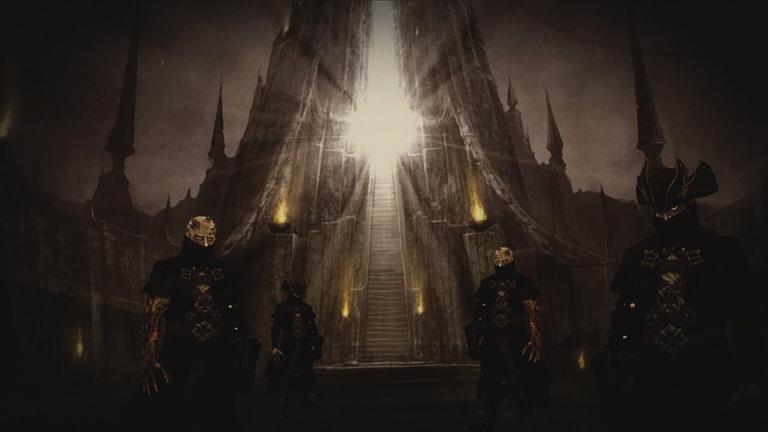
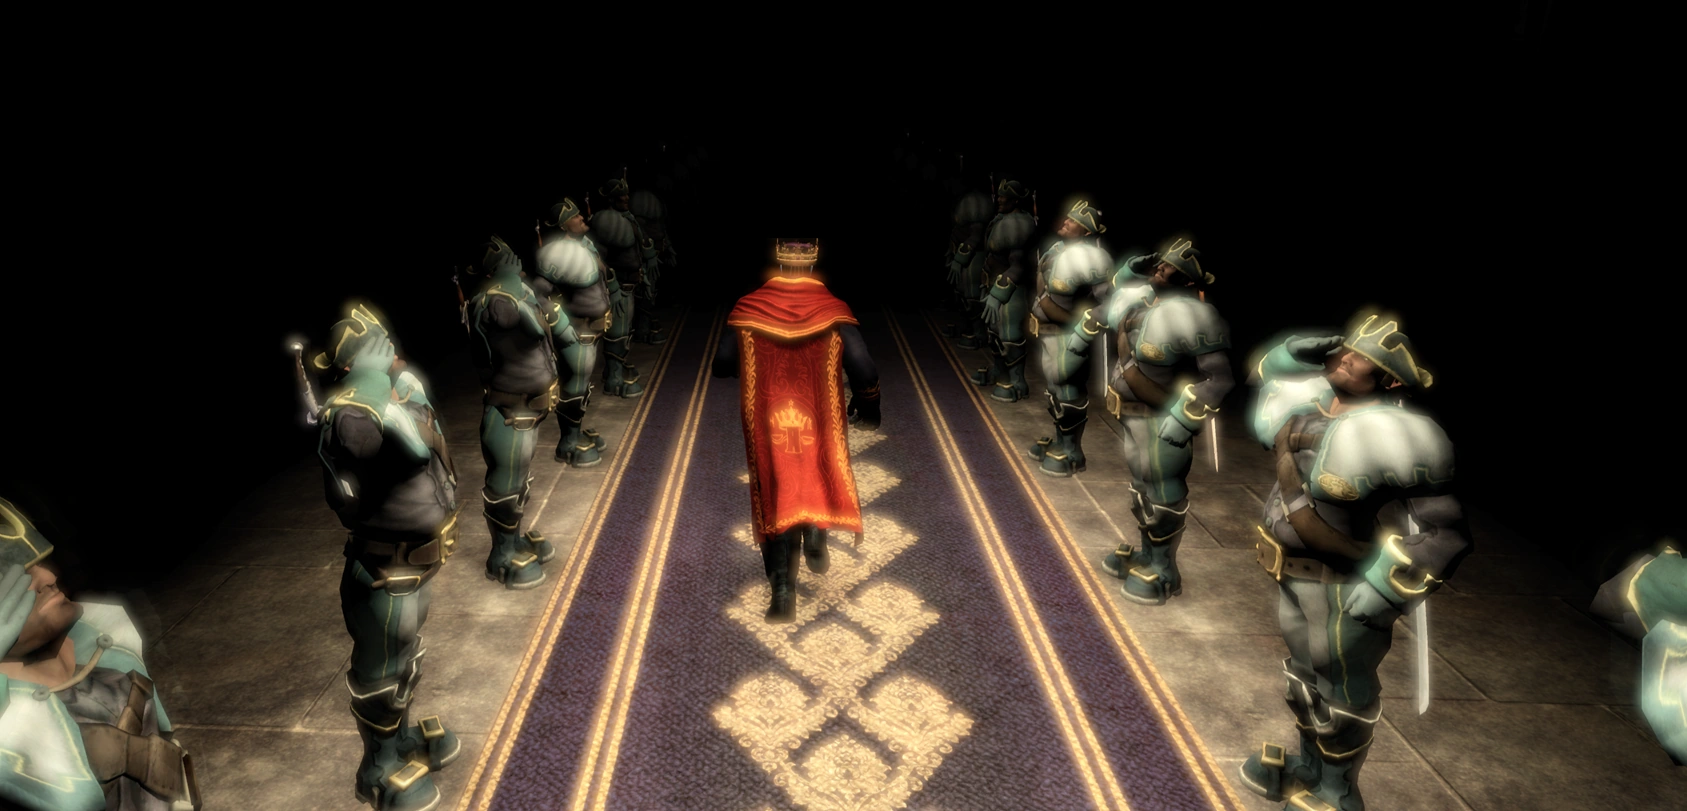
Upon exiting, Murgo's source comes through, and he gives the hero a model replica of the spire, which he claims will give the hero a small glimpse into the future. The hero returns to the spire, where they stand before Theresa. She now controls the completed spire and can be seen reviewing the magical threads that hold futuristic events. Theresa welcomes the hero back and says the spire had a gift for her too. Theresa then shows Sparrow deep into their future, where they are the monarch of Albion, with loyal guards and subjects who either fear their wrath or look to them for guidance. Theresa deems none of this as important, though, and says the only thing that matters is the hero's unborn child, destined for greatness, and the fate of all of Albion will lie in their hands, along with the fate of Aurora. Finally, Theresa tells the hero that, for now, they must live their life and that she will always be watching them.
On returning from the spire, the hero receives the Royal Suit, and Murgo delivers one last mystical item. This one is different from the others and is a replica of a Colosseum. Upon activating it, you are teleported to an arena where you fight waves of enemies (everything from beetles to Spire Guards). The new arena holds records and has different awards, and if you get the Ultimate Prize from 15,000 points, you are rewarded with the Royal Sceptre.
Fable III[]

Sometime after the events of Fable II, the Hero of Bower Lake unites Albion under a monarchy through "strength, cunning, and conviction". The hero may have overseen the birth of the "old guard", led by such men as Major Swift, Sir Walter Beck, and General Turner; the remnants of this army can be seen throughout Albion and eventually Aurora. Walter was a good friend to the hero, as he fought alongside them and eventually became their advisor once they established the monarchy.
At some point, The Hero of Bower Lake must have canonically obtained Castle Fairfax and renamed it Bowerstone Castle. The hero also created a private sanctuary with a dressing room, armoury, and treasure room. In the charming hamlet of Brightwall, The Hero of Bower Lake founded an Academy, the most excellent seat of learning throughout Albion. Deep within the academy, the hero built the Reliquary that housed some of their most significant possessions, amongst which was the music box that stopped Lucien from destroying Albion.

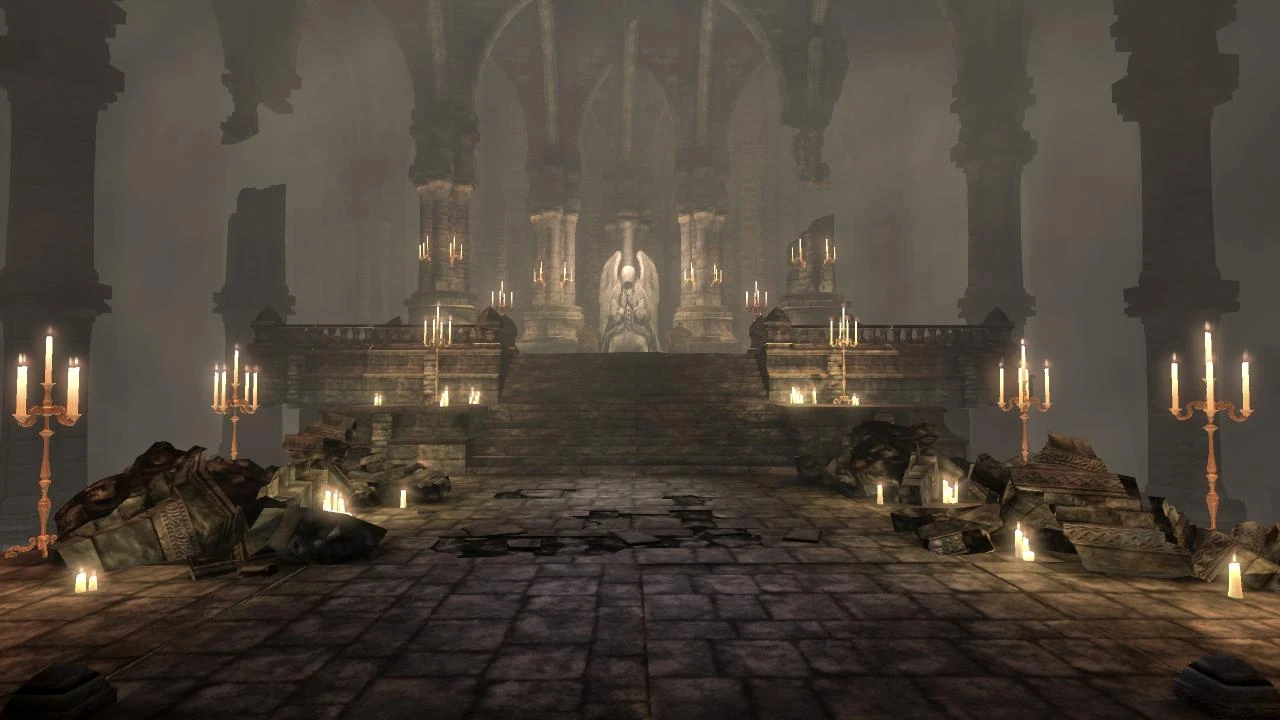
The Hero of Bower Lake's final resting place.
Sometime during their reign, the hero married and had two children: Logan and the Hero of Brightwall. Nearly fifty years into their rule, the hero died, and the hero and their spouse were buried in the royal gardens. The Guild Seal was hidden within the hero's tomb, an item needed to unlock the Reliquary.
The night of the hero's passing, they gave a final order to Sir Walter to guide their youngest child to their guild seal once they "were old and strong enough." Upon their death, the hero left the throne to their eldest child, Logan.
Powers and Abilities[]
As a member of the Archon's bloodline, the Hero of Bower Lake could use all three Heroic virtues and was highly skilled in each. Due to this, they were the most powerful hero of their generation.
Training themself from childhood, the hero unlocked their true power after visiting the Chamber of Fate. Throughout their adventures, the hero defeated countless formidable opponents, including the Commandant, Captain Dread, Darius Zing, Ripper, Thag, Dash, and The Great Shard. In addition, slaying numerous hordes of creatures such as hollow men, balverines, shadows, bandits, banshees, Trolls, and Hobbes single-handedly. Throughout their journey, the hero could pass all stages of The Crucible intact and resist the horrible power of one of the most potent weapons of the Old Kingdom - the Tattered Spire. The hero also demonstrated their incredible resolve when fighting through the cursed Wraithmarsh and surviving the falling from the heights of Fairfax Castle.
Years after Lucien's defeat, the Hero of Bower Lake demonstrated their cunning and intelligence when achieving a feat unheard of since the Old Kingdom - Uniting Albion under a strong monarchy, clearing the path for Albion's Industrial Age.
Notes[]
- In Fable III, the default gender for The Hero of Bower Lake is male and will be referred in the story as the "Old Hero King". However, if players played as female in Fable II, and the save file is on the same storage device, the dialogue will refer to her as a female. (The Old Hero Queen.)
- The Hero is also male in the novel Fable: The Balverine Order.
- The Hero is a descendant of the Hero of Oakvale; who is their "forbear" according to Theresa. This is also demonstrated in the Fable book "The Hero of Oakvale", which predicts that the Hero of Oakvale's descendant will one day save Albion. Further evidence can be found by accessing the treasure chest of the Hero of Southcliff in the Chamber of Fate, as out-of-game lore suggests that only the descendants of the Hero can open this chest.
- The hero may attack Lilith upon meeting her during the Road to Westcliff. She will laugh in a deep tone and vanish away. The hero and Hammer will still find her in the heart of the Howling Halls, but Hammer will have alternative dialogue.
- During Fable III, the Hero of Bower Lake is known as the "Old Hero King/Queen" instead of "Sparrow" or any other title chosen by the player.
- When the player fully establishes Driftwood in Fable III, there is a caravan named "Sparrow's Caravan".
- The playable character Hero in Fable Heroes is based on the male Hero of Brightwall, created in celebration of his coronation in Fable III. Additionally, all the in-game references are recreations of actions the Hero of Bower Lake performed during Fable II.
- Despite communicating almost entirely via non-verbal expressions, the Hero can speak on occasion, for example during the "play dead" expression when they very clearly say the words: "Got you."
- Rarely, a Fable III villager will say: "My grandfather was murdered under a clock tower by some nutter named Sparrow".
- During childhood, the Hero of Bower Lake is significantly bigger than other children (confirmed via in-game dialogue as 9 years old). If the Hero is the same age, they would be nineteen at the time they begin their journey at the Gypsy camp.
Trivia[]
- Sparrow is voiced by Nolan North (male) and Salli Saffioti (female).
- The name "Hero of Bowerstone" was given to Sparrow by the Fable community. They are referenced as the "Hero of Bower Lake" by Roland, the bard twice within Fable II. In Fable: The Journey, however, the description of the hero dolls uses the hero's community name within.
- At Bower Lake, Sparrow discovers their true destiny and officially obtains the title of hero, much like the Hero of Brightwall received their title by aiding the villagers of Brightwall.
Gallery[]
")
")
")
")
")
")
")
")
")
")
")
")
")
")